The production process of finished solar light poles involves multiple links, from design to assembly and testing, and needs to take into account the structure, electrical and solar system integration. The following is a detailed step-by-step process:
1. Design and planning
Demand analysis: Determine the height of the light pole (usually 3-12 meters), lighting power (such as 30W-100W LED), and the number of days of continuous operation (for rainy days).
Structural design: Use CAD software to draw the light pole drawings, including wind resistance level (such as level 12), tilt angle (such as 15° to optimize photovoltaic panel lighting), and material (commonly used Q235 steel).
Electrical design: Calculate the power of the solar panel (such as 80W-300W), battery capacity (such as 12V/50Ah lithium battery), and controller type (PWM or MPPT).
2. Material preparation
Light pole body: Purchase galvanized steel pipe (anti-corrosion treatment, wall thickness ≥3mm) or aluminum alloy (lightweight scenario).
Solar panels: monocrystalline silicon/polycrystalline silicon photovoltaic panels (efficiency ≥18%), lithium/colloid batteries (cycle life ≥2000 times), LED lamps (light efficiency ≥100lm/W).
Accessories: waterproof junction box (IP67), bolts (304 stainless steel), intelligent controller (with light control + time control + remote monitoring).
3. Light pole processing
Cutting and welding: Cut the steel pipe according to the drawing, and cut the large and small ends of the blank light pole flat.
Open the flange on the inspection door where the inspection door needs to be opened. Then weld the flange (bottom plate thickness ≥10mm) and the bracket (for fixing the photovoltaic panel). At present, the air-packed welding machine is generally used for manual welding.
Surface treatment: Send the welded light pole to the hot-dip galvanizing plant for hot-dip galvanizing, hot-dip galvanizing (zinc layer ≥85μm) or spraying (RAL color number customization) to ensure corrosion protection above C4 level.
The galvanized lamp poles are unloaded in the factory for straightening (because during the hot-dip galvanizing process, the lamp poles are easily deformed due to high temperature), fasteners are installed, and the inspection door cover is installed.
Drilling and grooving: reserve threading holes (aperture ≥ 20mm) and make waterproof sealing treatment.
Polishing: The lamp poles are polished (mainly to clean some zinc slag and zinc nodules).
4. Solar system assembly
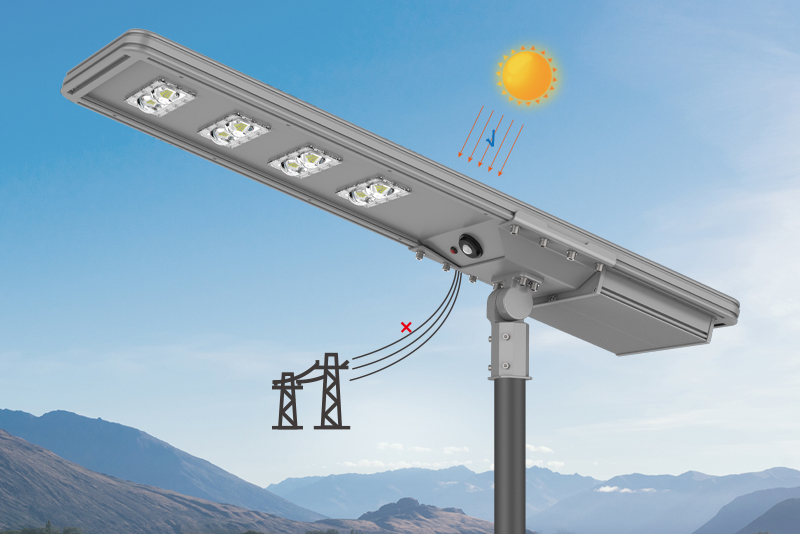
Photovoltaic panel installation: tilted and fixed on the bracket (the angle is adjusted according to the local latitude ±15°), and anti-reverse diodes are installed at the terminal.
Battery compartment production: welded sealed battery box (with heat dissipation holes + locks), built-in temperature sensor (-20℃~60℃ working range).
Lamp integration: welding of lamp head support arm, installation of LED module (color temperature 5000K/3000K optional), equipped with secondary optical lens (beam angle 120°). Weld nuts on the light pole (mainly for connecting the arm)
5. Electrical system connection
Wiring specification: Use PV1-F 4mm² solar dedicated wire (UV resistant), and the cable is protected by corrugated tube.
Controller wiring: Connect the battery-photovoltaic panel-load according to polarity, and connect the lightning arrester (surge protection ≥40kA).
Waterproof treatment: All joints are sealed with heat shrink tube + waterproof tape, and the junction box is potted with silicone (GB4208 IP65 standard).
6. Quality inspection
Structural test: vibration test (GB/T 2423.10), wind load calculation (wind pressure ≥800Pa).
Electrical test: photovoltaic open circuit voltage detection (expected value ±5%), charge and discharge cycle (3 times full charge and discharge).
Environmental simulation: high and low temperature test (-40℃~75℃), salt spray test (96 hours without rust).
7. Packaging and transportation
Protective packaging: Light poles are packaged in sections (PE bubble film + wooden box), and photovoltaic panels are packed separately (EVA foam padding).
Identification: Moisture-proof/fragile labels are attached, and the center of gravity is marked (to avoid overturning during lifting).
8. Installation and commissioning (user end)
Foundation construction: Casting of embedded parts (C25 concrete, depth ≥1.5 meters), and curing for 7 days.
System activation: The first charging takes 8 hours, and the controller parameters are set (such as 6 hours of lighting + 20% brightness energy-saving mode).
Key considerations
Safety specifications: The maximum voltage of photovoltaic panels is ≤DC48V (to avoid the risk of electric shock).
Maintenance design: The battery compartment must be detachable (bolt fixed), and the lamps are modular and quick-disassembled.
Intelligent upgrade: IoT interface (4G/NB-IoT) is reserved for future expansion.
Through the above process, the solar light pole can be ensured to operate stably within its life cycle (usually 8-10 years), with a comprehensive energy saving rate of more than 60%.


 English


 Scan WhatsApp
 Scan Wechat
 Scan WhatsApp
 Scan Wechat
 Consult Now